
Learn how to make croissants with this step-by-step tutorial. This recipe is designed to help beginners practice creating homemade laminated dough without committing to a full croissant recipe.
Croissants are humbling pastries. They’re flaky, buttery, delicate bread that can be made into sweet or savory snacks that you can find in any and every coffee shop or bakery from sea to shining sea, but most people don’t know how much time and work goes into them. More than once, I’ve heard Christopher Kimball (founder of Milk Street and America’s Test Kitchen) say that making croissants should be left to the professionals. I fully support his position.
Making croissants requires being loosely tethered to your kitchen for an entire day, alternating between rolling out butter with the dough and letting your work sit in the refrigerator for HOURS before baking. And if you’re a beginner, all that work will likely yield something that is nothing like the crescent pastries you get at a patisserie.
Even if you get the right shaped croissants, a baked croissant should shatter, which you can only achieve with a lot of patience.
In addition to the work, it requires A LOT of butter. A typical recipe calls for a giant butter slab — a whole pound — to make about two dozen croissants. If you don’t get it right the first time (which you will not), the work and the ingredients are wasted, compounding the disappointment of not mastering it.

On top of all that, making laminated doughs takes practice, practice and more practice. I baked croissants in culinary school and they didn’t turn out the way I wanted them to (of course). I quickly gave up on the idea of making them and I resolved to never try to make them again. However, recently, I decided I needed to be an expert at this. I’m an expert at making pie dough which opens up my kitchen to many possibilities and I thought that being able to make croissant dough would do the same—danish, kouign-amann, turnovers! So many dangerous pastries to be able to make without using store-bought puff pastry or weird prepared doughs that mask themselves as croissant knock-offs.
I worked on these for weeks and I’ve fused several recipes (Bouchon Bakery Cookbook, Cook’s Illustrated Baking Book, Chef’s Steps) to come up with this method to help people practice making croissants at a small scale to reduce waste (I hate waste) and yield a manageable amount of mistakes. To be clear: this recipe is for practicing, so I didn’t take any shortcuts and any sort of “cheating” is minimal.
Diminutive Dough
Cutting back on the dough was fairly easy. It’s scaled down enough that I didn’t use a stand mixer with a dough hook, just a wooden spoon. I also didn’t use a poolish because I wanted to make this as simple as possible, but I don’t think it made that much difference. Basically, I created a regular yeast dough—there’s nothing special about it.
Beating Down the Butter
I reduced the amount of butter significantly because it is, in my opinion, the biggest stumbling block. The butter block is a massive chunk of butter and beating it down inside an envelope of dough is tough to do well—you have to do it a few times to get it right. I got it down to 7 tablespoons or 3.5 oz and it still returns big, flaky croissants. However, the block that I make is not as thick as typical recipes. I did this to make the butter easier to work with and I don’t think it diminishes the quality of the croissants at all.
The one thing I tried for the sake of simplification was using salted butter instead of unsalted butter—don’t try it. It’s way too salty. I ended up using unsalted butter and sprinkling the salt in the butter square before I beat it.
I’m surprised by and pleased with the results. Croissants are one of those things that I never thought I’d be able to do but, you know, I persevered, rolling and folding layers of dough, and got exactly what I was trying to achieve: homemade croissants.
Croissants for Beginners
Dough
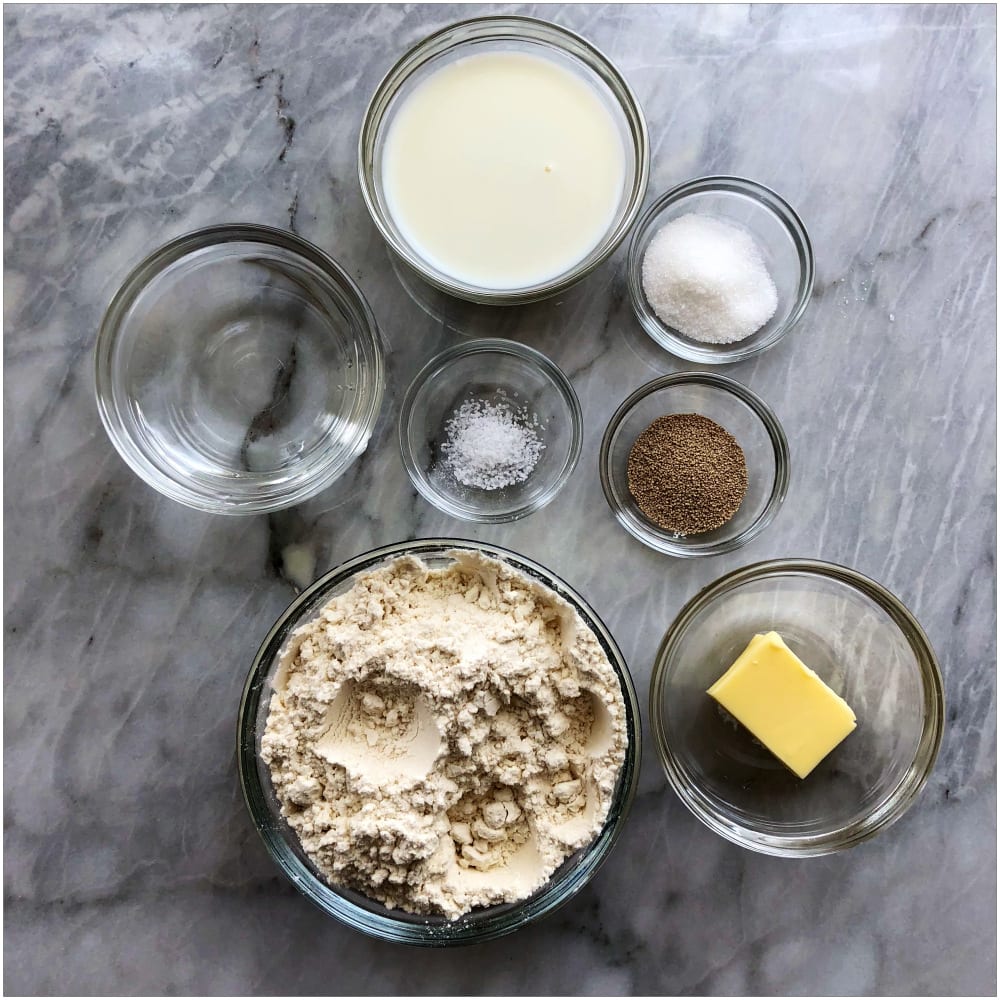
- 2 TB warm water
- 1 tsp active dry yeast (not instant yeast)
- 1 TB unsalted butter, melted, slightly cooled, plus more for bowl
- 1 TB sugar
- ⅓ tsp kosher salt
- 1 cup all-purpose flour, plus more for surface
- ¼ cup cold milk
Butter Block
- 7 TB (3.5 oz) unsalted European-style butter (at least 82% fat) (Plugra or Kerry Gold are good)
- ⅓ tsp kosher salt
Method:
Dough
In a large bowl, pour about a teaspoon of melted butter and set aside.
In a medium bowl, sprinkle the yeast over the warm water and let stand for 5 minutes and the yeast gets foamy.
Add the remaining melted butter, sugar, salt, flour, and milk.
Stir the yeast mixture until it’s fairly smooth and the dough is tacky. Don’t worry if it’s sticky, you’ll add plenty of flour when you’re rolling out the dough.

Place the dough in the buttered bowl and roll it around to coat the dough with the butter.
Cover with plastic wrap (tightly) and leave in a fairly warm, draft-free place to rise for 1 ½ hours and it’s doubled in size.
Punch down, cover again, refrigerate, and let it rise for another 1 ½ hours and it’s doubled in size (that’s called “proofing”). (Typically, I just put it in the refrigerator overnight so I can break up all the work and I am certain both the butter and dough are equally cold when I go to roll it all out).

Butter Block
Before you start anything, make sure your butter is cold (it cannot be room temperature).
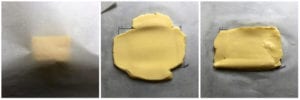
Then take a piece of parchment paper and draw a 5”x 3” rectangle in the middle with a Sharpee.
Turn over the paper and place the butter in the square.

Place a second piece of parchment paper on top and beat the butter with your rolling pin until it makes a 5” x 3” rectangle. You’ll have to do a bit of manipulating to work it into the square—it doesn’t have to be totally perfect, but you want to make sure it’s a solid rectangle and there are no air bubbles.

Place the butter (still on the paper) in the refrigerator for an hour. (You can do this the night before as well—that’s how I prefer to do it so everything is ready to start first thing in the morning.)
Dough + Butter
Prepare a small sheet pan by lining it with parchment paper and sprinkling it with flour and set aside. On a lightly floured surface, roll out the cold dough to make a 12” x 6” rectangle. Place it on the prepared baking sheet, cover with plastic and place in the freezer for ten minutes.
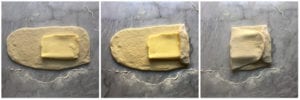
Return the cold dough to your work area. Place the butter block in the middle of the dough slightly right of center so that you can fold about 1” of the dough over the right side of the butter and the dough on the left side can fold over the remaining butter so it’s enveloped by the dough.

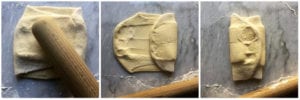
Using the rolling pin, lightly beat the dough so it starts to spread a little. Then gently roll out the dough until you have a 10” x 5” rectangle.
You want to make sure the butter doesn’t melt—this may require you to put the dough in the freezer for a couple minutes for this first “turn” and bring it back out to continue rolling it out.
When it’s the correct size and it’s pliable enough, fold it into thirds the way you would fold a piece of paper that would go into an envelope. Place on the prepared sheet pan, cover and place in the freezer for 30 minutes.

2nd Turn
Take the rectangle of dough and place it on your work surface in a way that is comfortable for you. I like to roll it out so that it’s horizontal, but you can do it vertically.
You’ll repeat the same method for rolling out the dough from the first turn so that it makes a 12” x 6” rectangle and fold into thirds again.
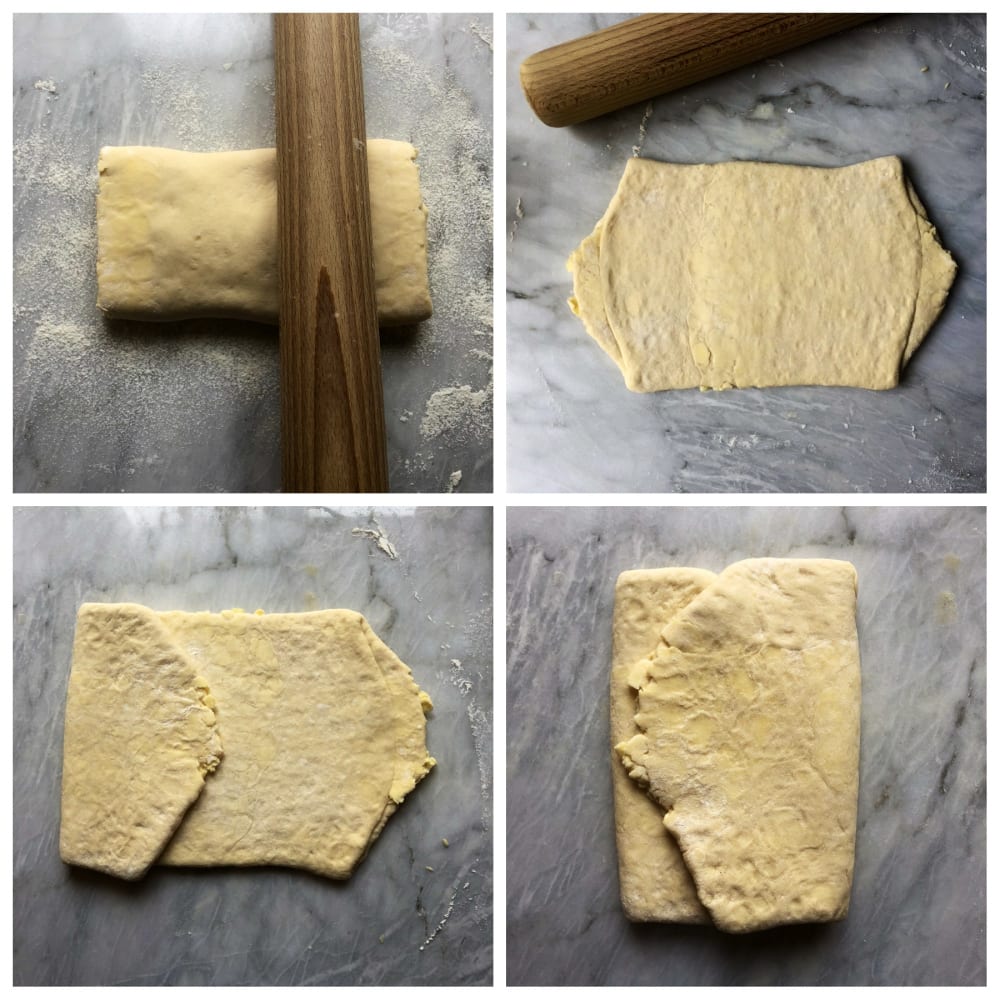
Repeat this for the 3rd and 4th turns. Place on the prepared sheet pan, cover and place in the freezer for 30 minutes.
Prepare a second sheet pan lined with parchment paper.
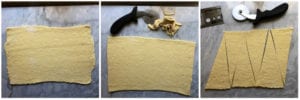
Roll out dough one final time and cut the dough into a 15” x 7” rectangle.
To make it a perfect rectangle, use a knife or pizza cutter to slice off the jagged edges.
Slice the remaining dough into 6 triangles—the base should be about 3.5”.

Place the triangles back on the sheet pan, cover and place in the freezer to work on one at a time.
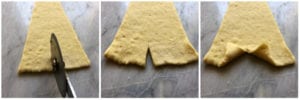
With a sharp knife or pizza wheel, make a ½” vertical slit on the base of the triangle.
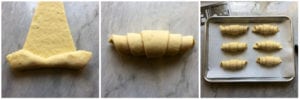
Gently stretch the corners made by the slit and fold them away from each other and then roll the dough away from you to make the crescent shape. Place on second prepared sheet pan.


Repeat shaping croissants for remaining five pieces of dough.
Cover the unbaked croissants with a dry towel and let rise for 1.5 hours or they’ve doubled in size.
Preheat oven to 425℉.
Brush with egg wash.
Place in the middle rack of the oven. Reduce heat to 400℉ and bake for 20 minutes, turning half way through. They’re done when they’re a golden brown. Remove from oven and place on wire rack to cool.

Bungled Biscuits If you don’t get the croissants right and you have some weird pastry mistakes, don’t throw them out! Instead, make them into bread pudding. Cut the rejects into pieces, set aside and let them get a little stale. In small bowl, whisk together two eggs, ½ cup milk, 3 TB sugar, and ½ tsp cinnamon. In an oven-safe ramekin (2-cup), melt a tsp butter in a preheated oven. When it’s melted, place the croissant pieces in the ramekin and pour the egg mixture over the croissant pieces. Bake at 375℉ for about 15 minutes or the egg is set. Let cool until very warm and serve.

Quick anecdote: I used to go to this diner around the corner from my house. Eggs benedict was my go-to meal. After culinary school and making, testing and tasting hollandaise sauce approximately 1,000 times, I returned to this diner for my favorite breakfast. What I discovered was all that practice made my palate more discerning and I could actually taste that the diner used a hollandaise mix rather than whisking together the egg, butter and lemon juice. It was a mix of disappointment and triumph. It was disappointing that I could no longer enjoy eggs benedict at a favorite breakfast spot but triumphant because I had practical evidence of my knowledge and new skill.
I had a very similar experience this morning at my favorite coffee shop. A croissant was on display that looked good. At first bite, it was obvious that it was made by a machine. It probably would have enjoyed it had I not gone through the trials and errors of learning how to make this arduous pastry.
This made me feel kind of invincible.

How to Make Croissants (For Beginners)
Ingredients
- 2 TB warm water
- 1 tsp active dry yeast
- 1 TB unsalted butter melted, slightly cooled, plus more for bowl
- 1 TB sugar
- ⅓ tsp kosher salt
- 1 cup all-purpose flour, plus more for surface
- ¼ cup cold milk
- 7 TB unsalted European-style butter (at least 82% fat) (Plugra or Kerry Gold are good) at least 82% fat (Plugra or Kerry Gold are good)
- ⅓ tsp kosher salt
Instructions
Dough
- In a large bowl, pour about a teaspoon of melted butter and set aside.
- In a medium bowl, sprinkle the yeast over the warm water and let stand for 5 minutes and the yeast gets foamy.

- Add the remaining melted butter, sugar, salt, flour, and milk.
- Stir everything together until it’s fairly smooth and the dough is tacky. Don’t worry if it’s sticky, you’ll add plenty of flour when you’re rolling out the dough.
- Place the dough in the buttered bowl and roll it around to coat the dough with the butter. Cover tightly with plastic wrap and leave in a fairly warm, draft-free place to rise for 1 ½ hours and it’s doubled in size.

- Punch down, cover again, refrigerate, and let it rise for another 1 ½ hours and it’s doubled in size (that's called "proofing").
Butter Block
- Take a piece of parchment paper and draw a 5”x 3” rectangle in the middle with a Sharpee. Turn over the paper and place the butter in the square.

- Place a second piece of parchment paper on top and beat the butter with your rolling pin until it makes a 5” x 3” rectangle.

- Place the butter (still on the paper) in the refrigerator for an hour.
Dough + Butter
- Prepare a small sheet pan by lining it with parchment paper and sprinkling it with flour and set aside. Unwrap dough from plastic wrap. On a lightly floured surface, roll out the chilled dough to make a 12” x 6” rectangle. Place it on the prepared baking sheet, cover with plastic and place in the freezer for ten minutes.
- Return the cold dough to your work area. Place the cold butter block in the middle of the dough slightly right of center so that you can fold about 1” of the dough over the right side of the butter and the dough on the left side can fold over the remaining butter so it’s enveloped by the dough.

- Using the rolling pin, lightly beat the dough so it starts to spread a little. Then gently roll out the dough until you have a 10” x 5” rectangle.
- Place on the prepared sheet pan, cover and place in the freezer for 30 minutes.
2nd Turn
- Take the rectangle of dough and place it on your work surface. Repeat the same method for rolling out the dough from the first turn so that it makes a 12” x 6” rectangle and fold into thirds again.

- Prepare a second sheet pan lined with parchment paper. Roll out dough one final time to make a 15” x 7” rectangle.

- Slice the remaining dough into 6 triangles—the base should be about 3.5”
- Place the triangles back on the sheet pan, cover and place in the freezer to work on one at a time.
- With a sharp knife or pizza wheel, make a ½” vertical slit on the base of the triangle.

- Gently stretch the corners made by the slit and fold them away from each other and then roll the dough away from you to make the croissant shape. Place on second prepared sheet pan.

- Repeat for remaining five croissants.
- Cover with a dry towel and let rise for 1.5 hours or they’ve doubled in size.

- Preheat oven to 425℉.
- Brush croissants with egg wash.
- Place in the middle rack of the oven. Reduce heat to 400℉ and bake for 20 minutes, turning half way through. They’re done when they’re a golden brown. Remove from oven and place on wire rack to cool.




One Comment
Comments are closed.